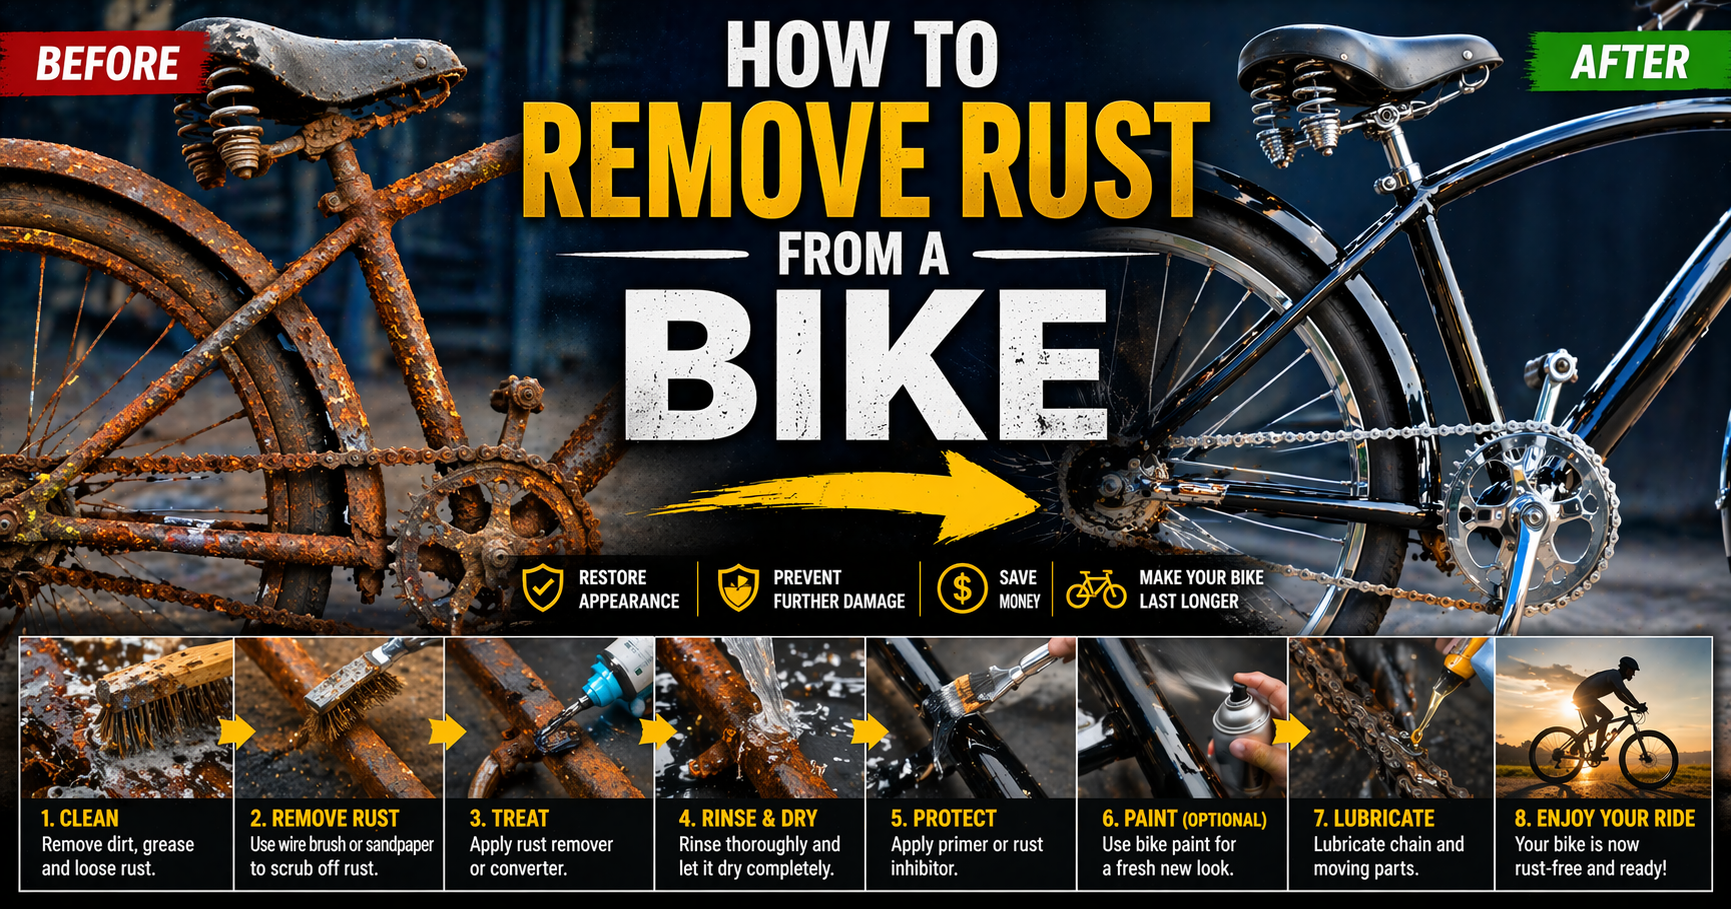
You pull your bike out of the garage after a winter of neglect, and the handlebars are spotted with rust, the chain is stiff and orange, and the frame has patches you don’t remember being there. It looks bad. But here’s the thing, almost none of it is beyond recovery. Removing rust from a bike is one of the more satisfying restoration jobs you can do, because the results are fast and visible, and the methods are mostly cheap. What separates a salvageable bike from a write-off isn’t how much rust there is. It’s where the rust is and how deep it’s gone.
This guide covers every part of the bike chain, frame, handlebars, spokes, and bolts with the right method for each.
Read the Rust Before You Start
Five minutes of assessment saves you hours of misdirected effort. Not all bike rust is the same, and treating heavy scale rust with a method designed for surface spots just wastes time.
Run your finger across the rusty area. If it’s rough and flaky, you’re dealing with moderate to heavy rust that’s had time to develop. If it’s a thin reddish-brown film with smooth metal underneath, that’s surface oxidation the easiest kind to remove. If the metal feels soft, pitted, or the rust goes through the piece entirely (common on cheap spoke nipples and small bolts), replacement is faster than restoration.
Check the frame separately. Steel frames rust from the outside in, but also from the inside out if water has been sitting inside the tubing. Shake the frame if you hear water sloshing; you’ve got internal rust developing. That’s a separate job, but worth knowing about before you start.
Structural vs cosmetic rust
On load-bearing parts, fork legs, chainstay, seatstay, and bottom bracket area rust that has visibly thinned the metal is a safety issue, not just an aesthetic one. If you can see deep pitting or the tube wall looks compromised, get it assessed by a bike mechanic before riding. For everything else, proceed.
What You Need
You don’t need a specialist toolkit. Most of what works on bike rust is already in your home or costs very little:
- White distilled vinegar
- Baking soda
- Fine steel wool (#0000 grade)
- An old toothbrush and stiff scrubbing brush
- WD-40 or penetrating oil
- Chain degreaser and fresh chain lubricant
- Metal polish or chrome polish (for polished surfaces)
- Sandpaper 400 and 600 grit for frame touch-ups
- Touch-up paint or clear coat (if repainting after)
- Cloths and paper towels
For a heavily rusted bike that needs serious work, citric acid powder is worth adding to that list. It’s cheap, safe to handle, and more aggressive than vinegar on thick rust without being as harsh as commercial rust removers.
Removing Rust from the Bike Chain
The chain is usually the worst-looking part and also the most important to get right a stiff, corroded chain puts stress on your drivetrain and can snap under load. Start here.
Light rust: WD-40 and a brush
Spray the chain generously with WD-40 and work a stiff brush through every link. WD-40 isn’t a long-term lubricant, but it’s excellent at displacing moisture and loosening light oxidation. After scrubbing, wipe the chain clean with a rag and check whether the links move freely. If they do, you’re done with the rust. Apply proper chain lubricant, not more WD-40, and you’re back in business.
Moderate to heavy rust: vinegar soak
Remove the chain from the bike. Submerge it fully in undiluted white vinegar and let it soak for 15–30 minutes. The acetic acid reacts with the iron oxide and loosens the rust from the links and rollers. After soaking, scrub with an old toothbrush, rinse thoroughly in clean water, and dry immediately — bare steel rerusts within minutes if left damp. Follow with a proper chain lubricant.
Honest limitation here: if the chain’s side plates are visibly pitted or the pins feel loose in the links, the rust has compromised the chain’s structural integrity. A new chain costs less than a replacement cassette caused by a snapped chain on a ride. When in doubt, replace it. Our guide on using vinegar to remove rust explains the chemistry in more detail if you want to understand what’s actually happening during the soak.
Rust on the Frame: Match the Method to the Finish
This is where you need to slow down. The right approach depends entirely on whether you’re working on bare steel, painted steel, or chrome-plated steel and they each need something different.
| Frame Finish | Best Method | What to Avoid |
|---|---|---|
| Painted steel (surface spots) | Fine steel wool, touch-up paint | Coarse sandpaper, wire brushes |
| Painted steel (heavy rust) | Sand to bare metal, treat, repaint | Rust converters under fresh paint without prep |
| Chrome-plated steel | Aluminium foil + water, chrome polish | Anything coarser than #0000 steel wool |
| Raw/unpainted steel | Vinegar soak or citric acid, then oil | Leaving bare metal unsealed |
| Aluminium (not steel) | Aluminium doesn’t rust — treat for oxidation only | Acid soaks |
Free Rust Removal Guide
Get our complete step-by-step rust removal guide covering every method, surface type, and product. Free to download.
Painted frame rust spots
Small rust patches on a painted frame usually mean the paint has chipped or scratched and moisture reached the steel underneath. Sand back the affected area with 400-grit sandpaper until you reach clean bare metal you’ll see silver rather than orange or brown. Wipe with a clean cloth, apply a rust-inhibiting primer, then touch-up paint matched to your frame colour. Done properly, it’s nearly invisible.
Don’t just paint over rust. It’ll blister through within months and you’ll be doing it again, but worse.
Chrome frame and components
Chrome-plated steel, common on older road bikes and vintage frames, needs a gentler hand. Aluminium kitchen foil dipped in water is the go-to first method: rub it over the rust spots in small circles and the mild galvanic reaction lifts the oxidation without scratching the plating. Follow up with a chrome-specific metal polish. Our dedicated guide on how to remove rust from chrome covers this process in full detail.
Handlebars, Bolts, and Small Components
Bolts, spoke nipples, and brake hardware are often the most rusted parts of an older bike and also the cheapest to replace. Seriously assess whether restoration is worth it before spending time on M5 bolts that cost pennies new.
For handlebars and stem components worth keeping: soak in a 50/50 vinegar-water solution for 1–2 hours, scrub with a toothbrush, dry completely, and apply a thin coat of oil or wax. Steel wool with metal polish restores shine on smooth surfaces. For badly pitted handlebar ends, a light sand followed by a coat of clear spray paint protects the metal without needing a perfect finish.
Seized bolts that won’t move: apply penetrating oil and leave it overnight before attempting removal. Forcing a rusted bolt strips the head and creates a much bigger problem. Patience here is genuinely the right strategy.
Preventing Rust from Coming Back
You’ve done the work. Don’t undo it by storing the bike badly.
The single most effective change you can make is storage location. A dry garage is good. A dry shed is acceptable. Leaving it outside under a cover that traps condensation is almost as bad as leaving it in the rain warm, humid air under a cover creates perfect rust conditions. If outdoor storage is unavoidable, use a cover with ventilation and put a moisture absorber underneath.
After wet rides, wipe the frame, chain, and any bare metal surfaces dry before putting the bike away. It takes two minutes. Relubricate the chain regularly — a well-lubricated chain sheds water far better than a dry one. For steel frames, a light wipe-down with a rag containing a drop of oil once a month keeps surface rust from getting a foothold.
For a full picture of long-term rust prevention strategies that apply to bikes and everything else in your workshop, our guide on how to prevent rust is worth reading through. And if you’re dealing with other rusty items while you’re at it, removing rust from metal tools follows very similar principles.
The Rust Restoration Handbook
The complete professional reference for rust removal and metal restoration. Every technique, product, and process in one handbook.
That Bike Isn’t Done Yet
Most rusty bikes that get written off could be riding again in an afternoon. Read the rust before you start, match the method to the surface, and don’t skip the protection step at the end. The chain is usually your biggest priority get that moving freely first, then work outward to the frame and components. Take it methodically and you’ll end up with a bike that looks better than it has in years, and you’ll know exactly what you did to get it there.