Rust doesn’t ask permission. One day your car looks fine, and the next you’re staring at a bubbling patch of orange creeping out from under the wheel arch. If you catch it early, removing rust from a car is a weekend job with basic tools. Leave it six months, and you’re looking at panel replacement. This guide covers exactly what to do — from identifying what you’re dealing with to finishing it so it doesn’t come back.
What Kind of Rust Are You Actually Dealing With?
Before you touch a single piece of sandpaper, you need to know what stage the rust is at. Treating surface rust the same way you’d treat a rusted-through floor pan will waste your time and money.
There are three stages that matter:
- Surface rust — The paint has broken down and oxidation is forming on the metal surface. The metal itself is still solid. This is the easiest to fix.
- Scale rust — The rust has penetrated deeper. The surface feels rough and flaky. You’ll need more aggressive treatment here.
- Penetrating rust — The metal has corroded all the way through. Holes, weak spots, or structural compromise. This is bodywork territory, not DIY touch-up.
Run your finger across the rusted area. If it’s just discolored paint with a slightly rough texture, that’s surface rust. If it flakes off and the metal underneath feels pitted and uneven, you’re dealing with scale rust. If you press on it and anything flexes or crumbles, stop — that’s a body shop conversation. For a deeper look at telling these apart, the guide on surface rust vs deep rust breaks it down clearly.
Tools and Products You’ll Need
Gather everything before you start. Stopping mid-job because you’re missing sandpaper is how you end up with bare metal sitting exposed overnight.
| Item | Purpose | Notes |
|---|---|---|
| 80–120 grit sandpaper | Initial rust removal | Use a DA sander for larger areas |
| 220–400 grit sandpaper | Feathering and smoothing | Work up progressively |
| Wire brush or wheel | Knocking off heavy scale | Angle grinder attachment for scale rust |
| Rust converter | Chemical neutralization | Useful on hard-to-reach areas |
| Self-etching primer | Adhesion to bare metal | Don’t skip this step |
| Body filler (if needed) | Filling pits and low spots | Only after rust is fully gone |
| Automotive primer surfacer | Surface prep before paint | Sand between coats |
| Touch-up paint or spray can | Color match | Use your car’s paint code |
| Clear coat | Protection and gloss | Apply over color coat |
| Masking tape and plastic | Protecting surrounding panels | Mask generously |
You don’t need professional equipment for a small patch. A decent random orbital sander, a can of self-etching primer, and matched paint will handle most surface and light scale rust repairs on a budget.
Free Rust Removal Guide
Get our complete step-by-step rust removal guide — covering every method, surface type, and product. Free to download.
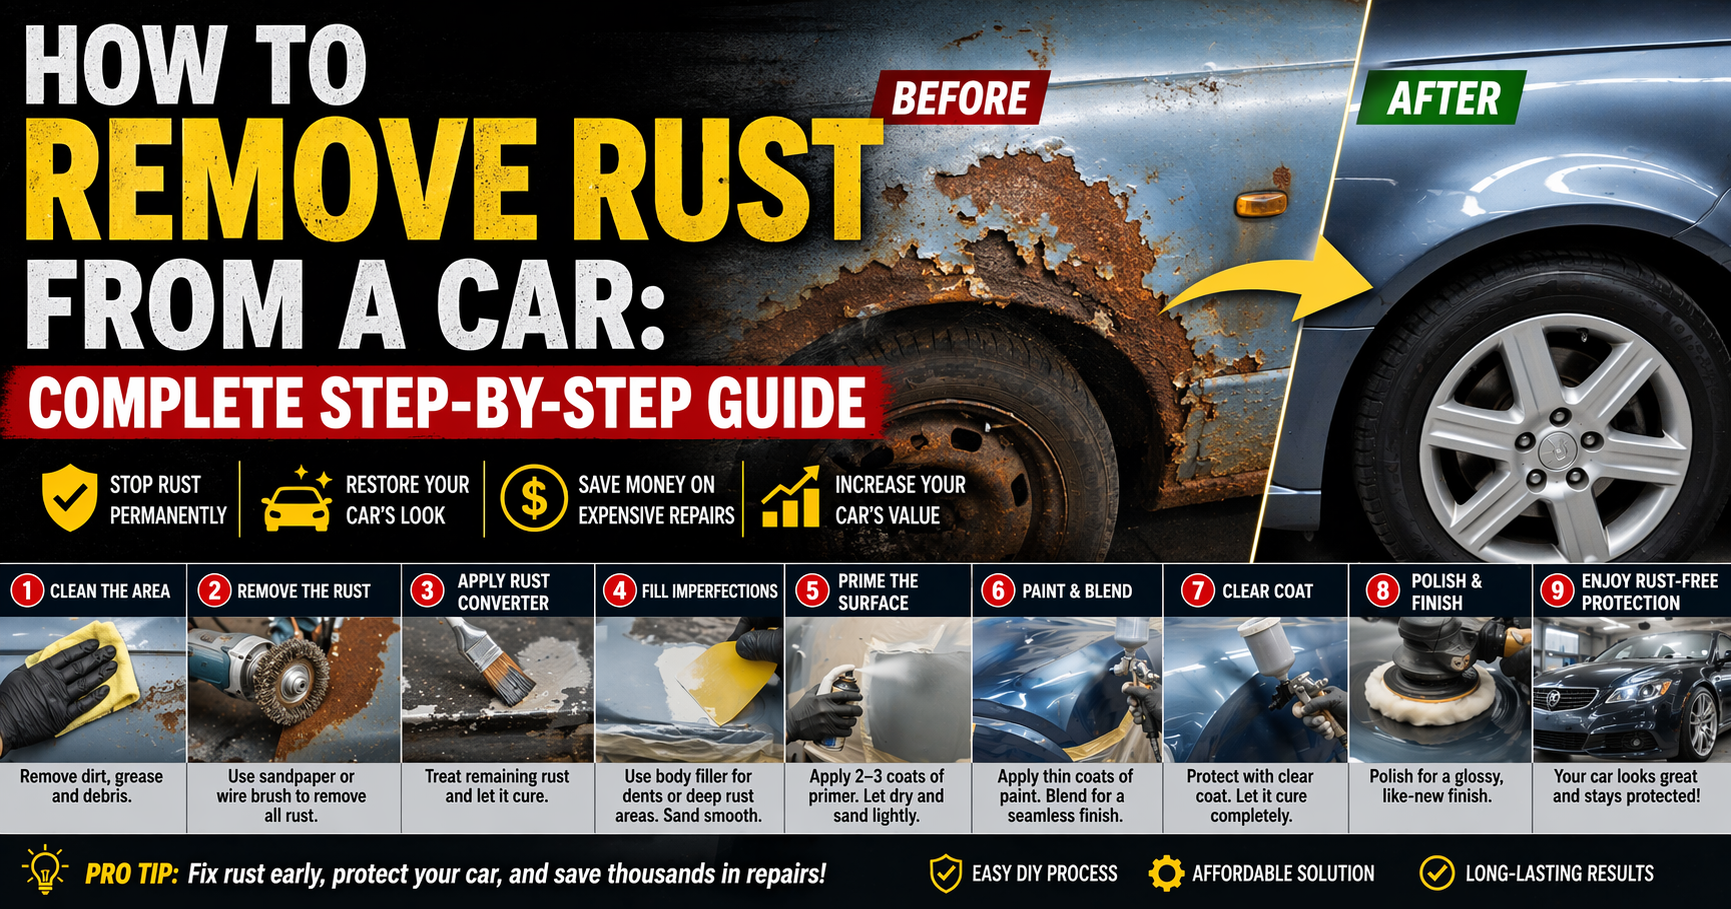
Step-by-Step: How to Remove Rust from a Car
This is the full process for surface to moderate scale rust. Each step feeds the next, so don’t skip ahead.
Step 1 — Wash and Degrease the Area
Clean metal is the only surface worth working on. Wash the rusted area thoroughly with car wash soap, rinse it, and let it dry completely. Then wipe it down with a wax and grease remover or isopropyl alcohol. Any contamination left on the surface — road grime, wax residue, oil — will interfere with adhesion at every stage that follows.
Step 2 — Sand Away the Rust
Start with 80 or 100 grit sandpaper and work in circular motions over the rust. You’re removing the corroded metal and any failing paint around it. Keep going until you hit clean, shiny metal with no orange or brown discoloration remaining. On scale rust, an angle grinder with a flap disc makes this significantly faster.
Then feather the edges. This means sanding the surrounding paint with progressively finer grits — 150, then 220 — so there’s a gradual transition rather than a hard edge where bare metal meets painted surface. Sharp edges will show through every coat of paint you apply. The honest limitation here: feathering takes patience, and rushing it is the most common reason amateur repairs look obvious.
Step 3 — Apply Rust Converter (Optional but Recommended on Scale Rust)
If you’re dealing with pitted or scale rust, a rust converter is worth using before priming. It chemically reacts with any remaining iron oxide and converts it into a stable compound that primer can bond to. It’s not magic — if there’s heavy rust left, it can’t substitute for proper sanding — but it’s good insurance on areas where getting every trace of rust mechanically is difficult.
Apply it with a brush, let it cure fully (usually 24 hours), and don’t paint over it until it’s completely dry. For more on how and when to use it, the guide on how to use a rust converter gives you the full process.
Step 4 — Apply Self-Etching Primer
Bare metal doesn’t hold paint. Self-etching primer contains acid that microscopically etches into the metal surface to create a mechanical bond. Apply two or three thin coats, letting each flash off before the next. Don’t try to build it up in one heavy coat — you’ll get runs and lifting.
Once it’s cured, block sand it lightly with 400 grit to smooth any texture. Then apply two coats of regular automotive primer surfacer over the top. This builds the surface and fills any minor imperfections before color goes on.
Step 5 — Fill Any Pits (If Needed)
If the rust left pitting or low spots in the metal, body filler is your next step. Mix it per the product instructions — getting the hardener ratio wrong is a common mistake that causes filler to stay tacky or crack later. Apply it thin, let it cure, then block sand with 80 grit to flatten it, followed by 180 to refine. Re-prime over any sanded filler areas.
Not every rust repair needs body filler. Surface rust rarely does. But if the metal feels uneven after sanding, don’t skip it — trying to fill pits with extra primer coats just creates paint thickness problems.
Step 6 — Mask Off the Surrounding Area
Tape off everything you don’t want paint on. Extend your masking plastic well beyond where you’re spraying — overspray travels further than you think, especially with aerosols on a windy day. Use quality masking tape pressed firmly at the edges. Cheap tape bleeds.
Step 7 — Apply Color Coat
Find your car’s paint code — it’s usually on a sticker inside the door jamb or under the bonnet. Order matched paint in a spray can or aerosol. Apply multiple thin coats, keeping the can or gun moving constantly. Let each coat flash before applying the next. Four to five thin coats builds proper coverage without runs.
Spraying in direct sunlight or below 10°C (50°F) causes problems. Mid-range temperature, low humidity, and shade are ideal conditions. The paint should look slightly flat at this stage — the clear coat brings the gloss.
Step 8 — Apply Clear Coat
Clear coat protects the color layer and restores gloss. Apply it the same way — thin, overlapping passes, multiple coats. Let it cure fully before wet sanding. Rushing this step causes haziness that’s a pain to correct.
Once cured (typically 24–48 hours), wet sand starting at 1500 grit, then 2000, then 3000. Follow with machine polish to blend the repaired area into the surrounding paint. Done right, a small rust repair should be nearly invisible.
What About Rust in Hard-to-Reach Spots?
Wheel arches, door bottoms, chassis rails — some rust sits where sandpaper can’t reach effectively. That’s where chemical methods come in. Rust converter brushed into cavities is the most practical option for enclosed areas. For exposed but awkward spots, a wire brush attachment on a drill can get into places a flat sander can’t.
Underseal and cavity wax are your protection options once the rust is treated. Cavity wax in particular — sprayed into box sections and door sills — is something most owners overlook until the damage is done.
If rust has gotten into structural components — floor pans, sill sections, chassis rails — and there’s actual penetration, this is professional repair territory. The question of whether the car is even worth repairing at that point comes down to value versus cost. That’s a real calculation, and the article on whether it’s worth removing rust from a car works through it honestly.
How to Stop It Coming Back
Fixing rust and then ignoring prevention is like patching a leak and leaving the tap on. Rust returns wherever moisture finds bare or damaged metal. Here’s what actually works for keeping it away long-term:
- Touch up paint chips immediately. Every chip is a rust start. The longer bare metal is exposed, the deeper it goes.
- Apply paint protection film or a quality wax to vulnerable areas — bonnet leading edges, wheel arches, door sills.
- Treat the underside. Underseal breaks down over time. Inspect it annually and recoat any areas showing wear.
- Use cavity wax on enclosed sections. Door sills, A-pillars, and roof channels are common rust traps that factory protection doesn’t cover adequately after a few years.
- Wash regularly, especially in winter. Road salt is the single biggest accelerator of car body rust. Getting it off the underside regularly makes a significant difference.
For a full breakdown of long-term prevention strategies, the complete rust prevention guide covers every method worth knowing.
Counterintuitive Point: More Sanding Is Better Than More Chemical
There’s a tendency to reach for rust converter or chemical remover and call the job done. Here’s the thing — chemistry helps, but it doesn’t replace mechanical removal. Any rust converter left over active corrosion will eventually fail. Any rust you painted over will keep spreading under the surface. Physical removal — grinding, sanding, getting back to clean metal — is the only method that actually eliminates the problem. Chemical treatment is a useful supplement, not a shortcut.
The same applies to heavy rust situations. If you want to understand where chemical methods genuinely help versus where they fall short, the guide on removing heavy rust and severe oxidation covers the distinction in detail.
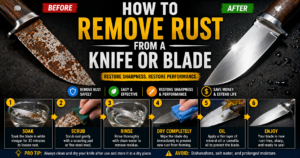
And if you’re dealing with rust elsewhere — tools, cookware, blades — the same core principles apply. The ultimate guide to rust removal and metal restoration covers all surfaces and methods in one place.
The Rust Restoration Handbook
The complete professional reference for rust removal and metal restoration. Every technique, product, and process — in one handbook.
Get It Done, Then Keep It Done
Rust doesn’t stop on its own. A patch you ignore this spring becomes a panel replacement by next autumn. The process laid out here — clean metal, proper primer, matched paint, clear coat, and a prevention plan — handles most car rust repairs correctly the first time. The only variable is how early you catch it. Surface rust caught now takes a few hours. Left untreated, it compounds into a problem that costs real money and raises real questions about whether the car’s worth saving. Act on it while the answer is still obvious.